

If you have a car and have driven in winter conditions, you are at risk for snow and ice build-up on your tires. One method of preventing the build-up is to make DIY wheel chocks or homemade wheel chocks. This guide covers all the steps necessary to prepare, store, carry, and use them for optimal results.
In this guide, you will find information on how to make DIY wheel chocks from items that can be found around your house.
What Is A Wheel Chock?
A wheel chock is a device used to prevent a vehicle from moving during certain types of operations, such as loading and unloading, working under the car, washing the car, driving on ice and snow or in high wind conditions.
The device will keep the vehicle from rolling while working on it. It should be placed in front of a tire so that it cannot roll forward or backward.
Benefits Of Having A Wheel Chock
There are a few benefits of having wheel chocks for your vehicle. First, when you need to wash your car, you will have the option to do so without worrying that the car will move while you are using the hose or cleaning supplies.
The same holds true if you need to apply de-icers or other treatments such as washer fluid or anti-freeze when temperatures drop below freezing.
Find out: How to clean your wheel wells & protect them better!
You can even use them when leveling trailer loads because they prevent the trailer from moving while you perform tasks under it.
DIY Wheel Chocks: Method 1
Tools & Materials Needed
- Two garden hose clamps (one for each side of the car)
- Pliers or scissors
Instruction:
Step 1: Attach A Garden Hose Clamp On Each Side Of The Car
It is necessary to attach one garden hose clamp on each side of the car. This will prevent the car from rolling forward or backward when using the chocks.
Cut off both ends of the hose clamps.
Remove any plastic or rubber pieces inside the clamp handles.
Insert your fingers into the handles and pull out any remaining pieces that might be in there.
On both sides, attach a garden hose clamp to each fender, with the flat part of the clamp tight against the fender without being too tight. Do not try to remove them once they are in place because they will break if you do so.
Step 2: Attach The Other Garden Hose Clamp To Each End Of The Chock
Now that you have attached the garden hose clamp to the sides of the car, it is time to attach them to each end of the chocks. This will ensure that they are secure and will not slide off.
Take your two chocks and place them under the front tires that you wish to use them for.
Once they are securely in place, take your other garden hose clamps and attach them to the chocks. Tighten them to ensure they are secure and will hold well.
Step 3: Attach The End Clamp To The Tire Or Fender
While you have the chocks in place under the tires, it is time to attach the end clamps to each end of the chock.
Take one piece and attach it to the tire to make sure it fits.
If the end is too small, do not use it on your tire and discard it. You will need a larger piece for this step.
Read more: How to organize sockets for a tidier garage!
Take the other end clamp and attach it to the chock that is already attached to your car. While holding this in place, make sure that you can fit them together easily without causing damage to either side.
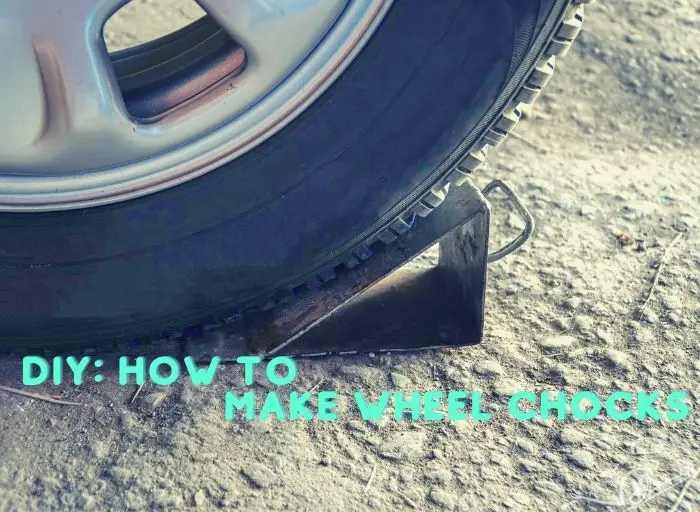
How To Make Wooden Wheel Chocks

Gather the necessary supplies: two pieces of 2×4 lumber, metal corner braces, and screws. You’ll also need a saw, drill, wrench, and screwdriver.
Step-by-Step Instructions
Step 1: Cut the pieces of lumber to the desired length – generally around 4-6 inches long. Both pieces should be cut to the same size.
Step 2:Attach a metal corner brace to each end of one piece of lumber with screws.
Make sure that one side is slightly higher than the other; this will help the chock stay in place when placed against a tire.
Step 3:With a drill and proper bit, create a hole on each end of the second piece of lumber for your screws to attach to the first piece at an angle (about 20 degrees).
Once secured with screws, these two pieces will form an X shape when seen from above and create a more stable platform for your wheel chock when used.
Step 4:Place one wheel chock on either side of your vehicle’s tires before beginning work or parking on an incline to ensure your vehicle stays secure while you’re away from it.
Check out This Video for Another Way to Make Wood Wheel Chocks
Tips to Ensure DIY Wheel Chocks Are Sturdy and Durable
When it comes to DIY wheel chocks, ensuring they are sturdy and durable is essential. Here are some tips on how to ensure that your wheel chocks will last:
- Choose the right material. Select a material that is weatherproof and strong enough to handle the weight of your vehicle. Common materials used for wheel chocks include wood, plastic, and metal like steel or stainless steel.
- Make sure the measurements are correct. When constructing your own wheel chock, make sure that you measure correctly so that it fits snugly around the tire and won’t move out of place when in use.
- Install securely. You should attach your DIY wheel chock securely so it won’t slip or come loose when in use. Use bolts or screws to secure them into place, depending on the material you choose to construct them from.
- Test frequently for wear and tear. Wheel chocks should be tested regularly for any signs of wear or damage, as they can become unsafe if they show signs of deterioration over time. It also helps to store them indoors when not in use to ensure their longevity and prevent damage from outdoor elements like rain or snow.
What Wheel Chocks Don’t Do
You can use wheel chocks to prevent your car from moving. However, they are not a substitute for other methods of preventing cars from moving unexpectedly.
They make a great addition to your toolbox for added safety measures when working on your vehicle, but they should also be used with other precautions in place.
We should avoid working on steep surfaces to ensure our safety.
Safety Tips for Using Wheel Chocks
Please use wheel chocks carefully, as they can be dangerous if not used properly. Here are some tips to help you use them safely:
- When using wheel chocks, always ensure that the surface you place them on is level and secure before parking your vehicle. This will reduce the risk of the chocks slipping out from under the tires.
- Place wheel chocks securely on both sides of the wheels to ensure maximum stability and avoid any movement when parking a trailer or other large vehicle. Be sure to use multiple chocks if needed for larger vehicles, as this will further decrease any possible movement.
- Make sure that the wheel chocks are in contact with both the ground and the tire at all times in order to provide better grip and stability.
- Before releasing a parked vehicle, remove its wheel chock(s). This is particularly important if you’re starting a heavy load or driving up an incline, as not doing so could cause loss of control or an accident due to instability caused by improperly placed or removed wheel chocks.
- Use appropriate-sized wheel chocks for your type of vehicle; larger vehicles require bigger-sized wheel chocks than smaller ones. Additionally, check that your chosen size is suitable for your specific application’s needs in order to maximize safety and efficiency while using them.
- Take extra precautions when working with oversized loads–use additional wheel chocks at each corner of the trailer if possible, as well as ensure that they are properly secured with chains or straps if needed for more security against accidental release.
FAQs
#1 What Can I Use Instead of Wheel Chocks?
A wheel chock is more durable and will hold your car in place better than a piece of plywood, but you can still use a piece of plywood and mount it on the fender. Another option is to use bricks.
#2 What Is the Best Angle for a Wheel Chock?
The best angle is when the chock is placed so that the car will not roll forward or backward when you are working under it. If the chock is lying flat, then that means it is at a small angle, and your tire can roll forward or backward easily while you are working on it. I find a 45-degree angle is the best option for normal tires.
Check out: How to clean your car tires: step-by-step!
#3 Do I Need 2 or 4 Wheel Chocks?
You can use 2 wheel chocks for your vehicle, but I recommend using four. This will reduce the chances of the car moving while you are working under or cleaning it, making it a safer option for everyone.
#4 Can You Drive Over Wheel Chocks?
No! Driving over a wheel chock will put a lot of pressure on the wheel or tire and could even cause the chock to come off. You should never drive over your wheel chocks.
#5 Which Tires Should I Place the Wheel Chocks On?
I usually place the wheel chocks on the rear tires of my car. This ensures that it won’t roll backward or forward, even if I work on a steep incline. Also, place the chock on a flat, solid surface so it won’t slide around.
Final Words
Being able to make your own DIY wheel chocks is convenient and fulfilling. With the right materials and ingenuity, you can be certain to have the perfect wheel chocks for your specific needs.
Wheel chocks offer a secure way to keep your vehicle in place, but it’s important to remember that they are not fail-proof. If you plan on parking on a slope or an uneven surface, use caution and consider additional stabilization methods for added safety.
Being aware of what wheel chocks do and don’t do will help keep you and your vehicle safe from harm when parking or towing.
Further Reading:
Hi there! I’m Naomi O’Colman. I’ve got years of experience working at an auto repair shop here in Texas under my belt. On top of that, ever since I was a kid I’ve been passionate about the auto industry. Since I’ve joined the team at automotivegearz.com I’ve been enthusiastically sharing my passion and insights with my readers. I’m dedicated to delivering high quality content and helping you stay up to date with the latest automotive trends and products out there!