
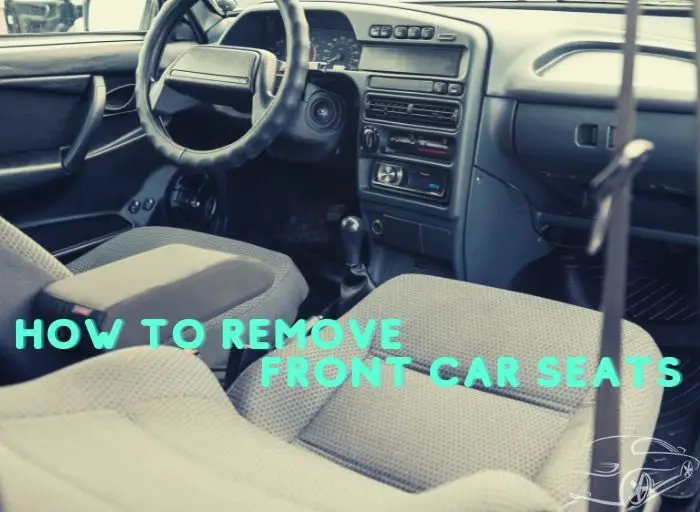

How to safely remove front car seats without damaging your vehicle? Removing the front seats is one of the most common car maintenance tasks. It usually goes unnoticed until the driver realizes that the seats no longer fit in properly.
Understanding Front Car Seats
Types of front car seats
Front car seats come in various types, each offering different features and designs to cater to different preferences and needs. Here are some common types of front car seats:
- Bucket seats: These seats are designed to provide individual seating for the driver and front passenger. They are typically contoured and offer additional support and comfort.
- Bench seats: Bench seats are designed for multiple occupants, accommodating two or three passengers in the front row. They provide a continuous seating surface without any separation.
- Split-folding seats: Some front car seats have a split-folding design, allowing the seatback to be folded independently. This feature provides flexibility for cargo storage or accommodating long items.
- Power seats: Power seats have electronic controls that enable easy adjustment of seat position, lumbar support, and sometimes even seat heating or cooling.
Components of a front car seat
Front car seats consist of various components that work together to provide comfort and support. Here are the main components of a typical front car seat:
- Frame: The seat frame serves as the foundation and structure of the seat, providing stability and support. It is usually made of steel or other durable materials.
- Cushion: The cushion is the part of the seat that you sit on. It is designed to provide comfort and distribute weight evenly. Cushions can have various types of foam padding and may include additional features like ventilation or memory foam.
- Seatback: The seatback is the upright portion of the seat that supports your back. It can often be adjusted for reclining or forward/backward positioning.
- Headrest: The headrest is positioned at the top of the seatback and provides support for the head and neck. It plays a crucial role in preventing whiplash injuries during rear-end collisions.
- Armrests: Some front car seats may have built-in armrests that provide additional support and comfort for the arms during long drives.

Car front seat mounting system
Front car seats are securely mounted to the vehicle’s floor to ensure stability and safety. The mounting system may vary depending on the make and model of the car. Here are the common seat mounting systems:
- Bolts: Many seats are secured using bolts that attach the seat frame to the vehicle’s floor. These bolts are typically located at the corners or sides of the seat.
- Clips: Some seats use metal or plastic clips that slide into designated slots or brackets on the vehicle floor. These clips provide a secure connection while allowing for easier removal or adjustment of the seat.
- Rails: Certain front car seats have rails attached to their frames, which enable sliding or horizontal adjustment. These rails may be secured to the floor using bolts or other fasteners.
- Electrical connections: Power seats, which have electronic controls, require electrical connections to function. These connections may include wiring harnesses, connectors, or plugs that need to be disconnected before removing the seats.
Identifying your car’s specific seat mounting system is essential to understand the removal process accurately and ensure a safe and successful seat removal. Refer to your car’s manual or seek professional advice for precise instructions related to your vehicle model.
Why Is It Necessary to Remove the Car Front Seat?
The front car seat of a vehicle generally serves three purposes: to provide the driver with five points of support and another means of support, to secure the passenger in place during an accident, and to allow him or her to ride comfortably in the rear portion of the vehicle.
To accomplish these functions, the seat has its own specific geometry that allows a passenger and driver to be positioned correctly without using any other parts of the interior for support.
Check out: Top Black Car Detailing Tips You Wouldn’t Wanna Miss!
However, after a period of regular use, these seats tend to wear out and become damaged. As a result, they no longer provide comfort for the passenger or safety for the driver. This is when drivers decide to remove the front seat and replace it with a new one or repair it.
But before you take apart your car seat, you must make sure that your car has enough space for two or more passengers to sit in the back seat for long distances.
Safety Precautions Before Removing Front Car Seats
Safety precautions are crucial when working on front car seats to prevent accidents and ensure personal safety. Before removing the front car seats, it is important to follow these safety precautions:
Disabling the airbag system before working on the seats

Modern vehicles are equipped with airbag systems for enhanced safety during accidents. It is essential to disable the airbag system before working on the seats to prevent accidental deployment, which can cause injury. Consult your vehicle’s manual for specific instructions on how to disable the airbag system properly.
Disconnecting the car’s battery as an extra precaution
To minimize the risk of electrical shock or accidental deployment of the airbags, it is recommended to disconnect the car’s battery before removing the front seats. This step ensures that there is no power running through the vehicle’s electrical system while you work on the seats. Follow the vehicle’s manual for guidance on how to disconnect the battery safely.
Properly supporting the car and preventing accidental movement
When removing front car seats, it is important to ensure that the vehicle is adequately supported and stable to prevent accidents or injuries. Follow these guidelines:
- Park the vehicle on a level surface: Choose a flat, stable surface to park your car before starting the seat removal process. This helps maintain stability during the procedure.
- Engage the parking brake: Make sure the parking brake is engaged to prevent the car from rolling or moving while you work on the seats.
- Use wheel chocks: Consider using wheel chocks or blocks to further secure the vehicle’s position. Place the chocks in front of and behind the wheels that are not being worked on to prevent unintended movement.
- Follow proper lifting techniques: If lifting the seats is required, use proper techniques to avoid straining your back or causing injuries. Use a suitable lifting device or ask for assistance if the seats are heavy.
- Avoid placing excessive weight on the seat rails: When removing or installing seats with rail systems, avoid placing excessive weight or pressure on the rails to prevent damage or misalignment.
How to Safely Remove Front Car Seats
If you are sure that your vehicle can accommodate passengers in the back seat, then you can safely remove the front seat. Here is a guide to help you safely and properly remove the front car seats:
Step 1: Read Your Owner’s Manual First
- If your vehicle has an owner’s manual, read it carefully before making any attempts to remove the car seat. This will give you more ideas on how to properly take off and replace your seats.
- Seats in your older model vehicle may not have any manual with them, but you can still find online manuals that will help you in removing them.
- You can download a manual from the manufacturer’s website or an online search engine. Take note, though, that this is only meant to highlight possible problems and solutions; do not rely solely on digital copies of manuals for your car maintenance needs.
- Another way to get more information is from the car dealer or a mechanic. In this case, it is important that you ask the right questions to ensure that you are doing the right thing.
For instance, ask whether your vehicle can accommodate at least two passengers in the back seat without causing any damage. If it cannot, then stop here and do not start removing the seats. You will only be wasting your time and money by doing so.
Wondering: Can you clean your seat belts with pressure washers?
You may also want to ask the dealer or mechanic about the procedures for removing those seats, especially in the case of an old car. Most of them have a manual on removing seats and replacing them. So, if your car does not have one, call your mechanic and ask him or her for it.
Step 2: Identify Your Tools and Materials
To take on this project confidently, you will first need some of your own car maintenance tools. A few of the tools to have are:
- Socket set: A socket set with various sizes of sockets and a ratchet handle is essential for removing seat bolts, which are typically secured with nuts or bolts.
- Wrenches: Depending on the seat design and mounting system, you may need a combination wrench or an adjustable wrench to loosen and remove bolts or nuts.
- Screwdrivers: A set of screwdrivers, including both flathead and Phillips head screwdrivers, may be needed to remove screws or fasteners holding seat covers, trim pieces, or electrical connections.
- Torx or Allen wrenches: Some car seats may have specific screws or bolts that require Torx or Allen wrenches for removal. Check your car’s manual or seat manufacturer’s instructions to determine if these tools are necessary.
- Pliers: Pliers can be handy for disconnecting electrical connectors, especially if they have retaining clips or are difficult to reach.
- Trim removal tools: These specialized tools help pry and remove plastic trim pieces, clips, or panels without damaging them. They are useful when accessing hidden fasteners or releasing seat covers.
- Electrical connector release tools: Some seats may have electrical connectors that require specific release tools to disconnect them safely. These tools help release the locking tabs without damaging the connectors.
- Floor jack and jack stands: If necessary, a floor jack and jack stands can be used to elevate the vehicle and provide additional clearance for seat removal. This is particularly useful when dealing with seats mounted on rails.
Step 3: Identify the Seat Manufacturer
- First, ensure that you are dealing with a car seat manufactured by an approved manufacturer.
- A list of authorized manufacturers can be found in your owner’s manual. If not, check out the manufacturer’s website since the information is readily available. If you can’t find it there either, you can contact a supplier or dealer and ask them for the manufacturer’s contact number.
Step 4: Identify the Seat Model Number
- The model number will also be on a label attached to the seat. Refer back to the manufacturer’s website, or contact your supplier or dealer for assistance in identifying your car seat’s model number.
Step 5: Locate the Seat Bolts and Remove Them
- There are typically six bolts that hold a car seat onto your vehicle. Most of these bolts are lined up vertically along the main rail of your seat.
- There will be two at the front, one at the bottom, and one at each side. You might have to disconnect a head restraint before removing these bolts. Use a socket wrench and ratchet to remove them.
Step 6: Remove the Seat from Your Vehicle
- With all of your bolts removed, use nylon or plastic seat clamps to keep your seat’s edges in place. A nylon strap works best for this purpose, but you can also use a cloth for this task if you have nothing else available.
- You can now remove your seat and place it somewhere safe, preferably in a garage.
Step 7: Clean the Seat, Bolts, Boltshafts, and Holes
- First, take off the bolts’ heads using a hammer. It will make things much easier for you to clean them afterward.
- Then take out the bolt shafts one by one from the old seat and set them aside for safekeeping. This will give you enough space to remove and clean them thoroughly later in the process.
Find out: How to QUICKLY remove stains from car seats!
- Use a pry bar and a rag to clean the holes in your seat. The cloth will help you remove all of the dirt and grime from the holes in the seat, while the pry bar will help you remove any remaining bolt shafts or other metal pieces stuck in it.
Step 8: Clean the Area Where You Want to Put Your New Seat
Before putting your new seat in place, make sure that there is no dirt or grime on your vehicle’s flooring. You can do this by cleaning the area with a rag.
- Read More: How to clean between your car seats!?
This will ensure that your new seat will not get dirty after you put it in place.
Check out This Video for Any Car Front Seat Removal!
Dealing with Difficulties and Challenges When Removing Front Car Seats
While removing front car seats is generally a straightforward process, there can be some difficulties and challenges that you may encounter. Being aware of these challenges can help you prepare and overcome them effectively. Here are some common difficulties and challenges when removing front car seats:
Stubborn or rusted bolts
Over time, seat bolts can become corroded or tightly fastened, making them challenging to loosen. Use penetrating oil and allow it to soak into the bolts before attempting to remove them. Additionally, using the appropriate size and quality of tools, such as a breaker bar or impact wrench, can provide more leverage and torque to loosen stubborn bolts.
Electrical connections and sensors
Power seats often have electrical connections and sensors that need to be disconnected before removing the seats. These connectors can be challenging to access or disconnect due to their location or tight fit. Carefully examine the connectors and follow the manufacturer’s instructions or consult the vehicle’s manual to release the connectors without damaging them.
Heavy or bulky seats
Some front car seats, especially those with additional features like heating or cooling elements, can be heavy and bulky. Removing and maneuvering such seats can be physically demanding. It is advisable to use proper lifting techniques, seek assistance if needed, and consider using a suitable lifting device or sliders to make the process easier and safer.
Hidden fasteners or clips
Seat covers or trim pieces may conceal hidden fasteners or clips that secure the seats. These hidden fasteners can be challenging to locate and access. Use trim removal tools or consult the vehicle’s manual to identify the correct points for releasing or removing these hidden fasteners or clips without damaging the surrounding materials.
Sensitivity of airbag system
Modern vehicles with active airbag systems are designed to detect changes or tampering with seat components. Improper removal or reinstallation of seats can trigger fault codes or even inadvertently deploy the airbags. It is crucial to follow the manufacturer’s instructions and ensure the airbag system is properly disabled before working on the seats.
Misalignment during reinstallation
Ensuring proper alignment and attachment to the mounting points is essential when reinstalling front car seats. Misalignment can affect the stability and functionality of the seats. Correctly align the seat and securely fasten the bolts or clips according to the manufacturer’s specifications.
Unique challenges for specialty seats
Some vehicles may have specialty seats with additional features, such as integrated airbags, seatbelt tensioners, or motorized adjustments. Removing these seats requires extra caution and may involve other steps or precautions. Consult the vehicle’s manual or seek professional advice to understand the specific requirements for removing specialty seats.
By being aware of these difficulties and challenges, you can approach the seat removal process cautiously and address any issues effectively.
How to Reinstall Front Car Seats
Reinstalling front car seats is a crucial step after their removal. Proper reinstallation ensures the seats are secure, stable, and function correctly. Here are the steps to follow when reinstalling front car seats:
Step 1: Preparing the mounting area and ensuring cleanliness
Thoroughly clean the mounting area on the vehicle’s floor, removing any debris or foreign objects that could interfere with the seat installation.
Inspect the seat tracks, bolts, or clips for any damage or signs of wear. Replace any damaged components before proceeding.
Step 2: Aligning the seat with the mounting points
Position the seat in the correct orientation and align it with the mounting points on the vehicle’s floor.
Ensure that the seat tracks or rails are properly aligned with the corresponding slots or brackets on the floor.
Step 3: Securing the seat using appropriate bolts or clips
Insert and hand-tighten the bolts or clips to secure the seat in place. Start with the corner bolts or clips and gradually work your way around, evenly tightening them.
Use the appropriate torque specifications provided by the vehicle’s manufacturer to tighten the bolts or clips to the recommended level. Avoid overtightening, as it may damage the threads or mounting points.
Step 3: Reconnecting electrical connections and accessories
If the seats have electrical connections, carefully reconnect them according to the manufacturer’s instructions or color-coding.
Double-check that all electrical connections are securely attached and properly seated.
Test the seat controls, such as adjusting the seat position, reclining, and any other features, to ensure they function correctly.
Step 4: Testing and verifying seat installation
Once the seat is securely installed, test its stability by applying gentle pressure in different directions. The seat should feel stable and not move excessively.
Verify that the seat is properly aligned and level, ensuring it sits evenly on the floor and is not tilted or lopsided.
Test the seat adjustments, including the seatback recline, height adjustment, and lumbar support (if applicable), to ensure they work smoothly.
Remember, following the manufacturer’s instructions and specific guidelines in your vehicle’s manual is crucial to properly installing front car seats.
Check out This Video for Removing and Replacing a Car’s Front Seat!
Frequently Asked Questions
Can I remove the front car seats without professional help?
Yes, removing the front car seats without professional help is possible. However, it is important to carefully follow the manufacturer’s instructions and take necessary safety precautions to avoid any damage or injury during the process.
How do I disable the airbag system before removing the seats?
To disable the airbag system before removing the seats, consult your vehicle’s manual for specific instructions. You may need to disconnect the battery, remove airbag fuses, or use a diagnostic tool to disable the system. It is important to follow the recommended steps to ensure safety and prevent accidental airbag deployment.
Are there any special tools required for seat removal?
The tools required for seat removal may vary depending on the vehicle and seat type. Generally, basic tools like socket sets, wrenches, screwdrivers, and trim removal tools are commonly used. Refer to the specific instructions provided by the vehicle’s manufacturer or consult the vehicle’s manual to determine if any special tools are necessary.
Can I reinstall a different type of seat in my car?
Reinstalling a different type of seat in your car may be possible, but it depends on various factors such as compatibility, mounting points, electrical connections, and safety considerations. It is recommended to consult a qualified mechanic or automotive technician to assess the feasibility and ensure proper installation according to the vehicle’s specifications.
What should I do if the seat bolts are stripped or damaged?
If the seat bolts are stripped or damaged, it is important not to force or continue attempting to remove them, as it can worsen the situation.
Conclusion
This is how you can safely and properly remove your car’s front seats without damaging them. You may also ask for the help of a trained professional if you need any assistance. If you follow all the steps in this guide, you will eventually find your way around it.
Hi everyone, My name is Ollie Barker.
As a seasoned auto expert I have 25 years of experience working in repair and detailing shops. I love to share my tips & tricks to all car lovers, so that’s why I’m here at Automotive Gearz publishing my content, sharing my passion. Also, I’ve been giving my recommendations on which products are the best to have on the market. I always thought it was hard to pick the right part, so hopefully I can make that a bit easier for you.
Hope you enjoy your time on my little blog!