
When it comes to your vehicle’s braking system, the master cylinder is a crucial component that plays a vital role in ensuring your safety on the road. It is responsible for converting the force exerted on the brake pedal into hydraulic pressure, which is then transmitted to the brake calipers and wheel cylinders.
This pressure forces the pistons in the calipers and wheel cylinders to clamp down on the brake rotors and drums, slowing or stopping the vehicle.
In this article, we will delve into the basics of the master cylinder brake, its components, and how to troubleshoot and maintain it.
What is a Master Cylinder Brake?
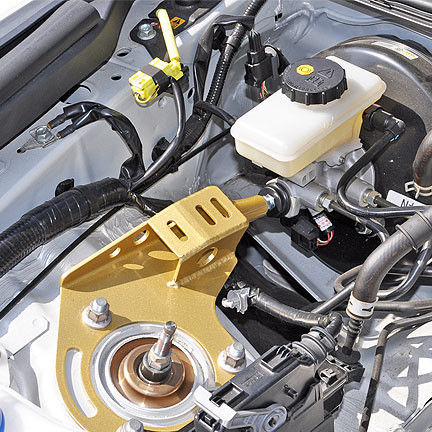
The master cylinder is a cylindrical metal reservoir divided into two chambers by a piston. The piston is connected to the brake pedal by a pushrod. When you press the brake pedal, the pushrod forces the piston to move down, pressurizing the brake fluid in the front chamber.
This pressurized fluid is then transmitted through the brake lines to the front and rear brakes. The rear chamber of the master cylinder contains a return spring, which pushes the piston back up when you release the brake pedal. This allows the brake fluid to flow back to the reservoir.
Components of the Master Cylinder Brake
- Reservoir: The reservoir is where the brake fluid is stored. It is usually made of plastic or metal and has two compartments for the front and rear brakes.
- Piston: The piston is a metal rod that moves back and forth inside the master cylinder. It is connected to the brake pedal by a pushrod and is responsible for creating the hydraulic pressure needed to engage the brakes.
- Pushrod: The pushrod connects the brake pedal to the piston. When you press the brake pedal, the pushrod pushes the piston, creating pressure in the brake fluid.
- Seals: The master cylinder has rubber seals that prevent the brake fluid from leaking out of the system. Over time, these seals can wear out and cause leaks, leading to a loss of braking power.
- Return Spring: The return spring is located in the rear chamber of the master cylinder and helps push the piston back up when you release the brake pedal.
Master Cylinder Brake Booster
Many vehicles use a brake booster to increase the amount of braking force that can be applied with the brake pedal. The brake booster is a vacuum-operated device that multiplies the force applied to the brake pedal by up to five times. This makes it easier for drivers to apply the brakes, especially in emergency situations.
How Does the Brake Booster Work?
The brake booster is connected to the intake manifold of the engine. When the engine is running, it creates a vacuum in the intake manifold. This vacuum is used to operate the brake booster. When you press the brake pedal, the vacuum in the brake booster decreases, causing a diaphragm inside the booster to move. This movement then pushes a rod into the master cylinder, creating pressure in the brake fluid and engaging the brakes.
Signs of a Faulty Brake Booster
- Hard Brake Pedal: If your brake pedal feels hard and requires more effort to engage the brakes, it could be a sign of a faulty brake booster.
- Spongy Brake Pedal: On the other hand, if your brake pedal feels spongy and goes all the way to the floor before engaging the brakes, it could also indicate a problem with the brake booster.
- Hissing Noise: A hissing noise coming from the brake pedal or under the hood could indicate a leak in the brake booster’s vacuum line.
- Brake Fluid Leaks: If you notice brake fluid leaking from the brake booster, it could be a sign of a damaged diaphragm.
If you experience any of these signs, it is essential to have your brake booster inspected and repaired by a professional mechanic.
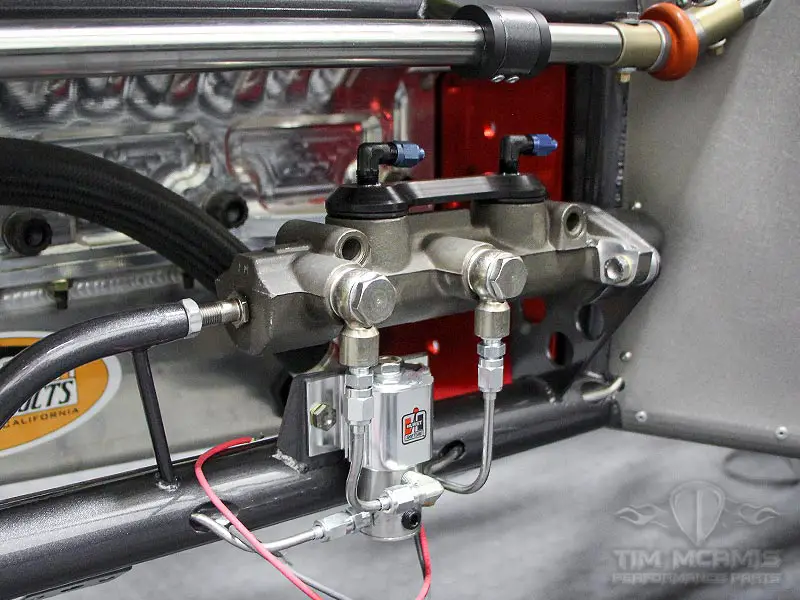
Master Cylinder Brake Line

The brake lines are responsible for carrying the pressurized brake fluid from the master cylinder to the brakes. They are made of metal or rubber and can be found running along the frame of the vehicle. Over time, these lines can become corroded or damaged, leading to leaks and a loss of braking power.
Signs of a Faulty Brake Line
- Leaking Brake Fluid: If you notice brake fluid leaking from under your vehicle, it could be a sign of a damaged brake line.
- Soft Brake Pedal: A soft brake pedal that goes all the way to the floor before engaging the brakes could indicate a leak in the brake line.
- Brake Warning Light: A faulty brake line can trigger the brake warning light on your dashboard.
- Reduced Braking Power: If you notice a significant decrease in your vehicle’s braking power, it could be due to a damaged brake line.
If you experience any of these signs, it is crucial to have your brake lines inspected and replaced if necessary.
Master Cylinder Brake Bleeder Kit
A brake bleeder kit is a tool used to remove air bubbles from the brake system. Air bubbles can get trapped in the brake lines, causing a spongy brake pedal and reduced braking power. The brake bleeder kit uses a vacuum to draw out the air bubbles, ensuring that the brake system is free of any air pockets.
How to Use a Brake Bleeder Kit
- Start by locating the brake bleeder valve on each brake caliper or wheel cylinder. It is usually located at the top of the component and has a small rubber cap covering it.
- Remove the rubber cap and attach the hose from the brake bleeder kit to the valve.
- Have an assistant press down on the brake pedal while you open the valve. This will allow the brake fluid and air bubbles to flow out of the system.
- Close the valve and release the brake pedal. Repeat this process until no more air bubbles are visible in the brake fluid.
- Once all the air bubbles are removed, close the valve and replace the rubber cap.
- Repeat this process for each brake caliper or wheel cylinder.
Master Cylinder Brake Fluid
Brake fluid is a type of hydraulic fluid that is used in the braking system. It is responsible for transmitting the force from the master cylinder to the brakes, allowing them to engage. Over time, brake fluid can become contaminated with moisture, dirt, and debris, affecting its performance. It is essential to regularly check and replace your brake fluid to ensure your vehicle’s braking system is functioning correctly.
Types of Brake Fluid
- DOT 3: This is the most common type of brake fluid and is suitable for most vehicles. It has a boiling point of around 401°F and should be replaced every two years.
- DOT 4: This type of brake fluid has a higher boiling point of around 446°F and is recommended for high-performance vehicles. It should also be replaced every two years.
- DOT 5: DOT 5 brake fluid is silicone-based and should not be mixed with other types of brake fluid. It has a boiling point of around 500°F and is commonly used in military and racing vehicles.
- DOT 5.1: Similar to DOT 4, this type of brake fluid has a higher boiling point of around 500°F and is suitable for high-performance vehicles. It should also be replaced every two years.
Signs of Contaminated Brake Fluid
- Dark Color: Fresh brake fluid is usually clear or slightly yellow in color. If you notice your brake fluid is dark brown or black, it could be a sign of contamination.
- Cloudy Appearance: Contaminated brake fluid can also appear cloudy or have particles floating in it.
- Low Brake Fluid Level: If you notice your brake fluid level is consistently low, it could be due to a leak or evaporation caused by contaminated brake fluid.
- Spongy Brake Pedal: As mentioned earlier, air bubbles in the brake fluid can cause a spongy brake pedal.
If you experience any of these signs, it is essential to have your brake fluid flushed and replaced by a professional mechanic.
Master Cylinder Brake Line Diagram
A brake line diagram is a visual representation of the brake system’s components and how they are connected. It can be helpful when troubleshooting brake issues or when replacing brake components. Below is a simple diagram of a typical master cylinder brake system:
Master Cylinder Brake System
The master cylinder brake system is a closed hydraulic system that relies on pressure to engage the brakes. It is crucial to regularly maintain and inspect this system to ensure its proper functioning. Neglecting maintenance can lead to costly repairs and compromise your safety on the road.
Maintenance Tips for the Master Cylinder Brake System
- Check the brake fluid level regularly and top up if necessary.
- Inspect the brake lines for any signs of damage or leaks.
- Have your brake fluid flushed and replaced every two years.
- Replace the brake pads and rotors as recommended by your vehicle’s manufacturer.
- Have your brake booster inspected and repaired if necessary.
- Check the brake light switch to ensure it is functioning correctly.
- Bleed the brake system if you notice a spongy brake pedal.
- Have your brake system inspected by a professional mechanic if you experience any issues with your brakes.
Master Cylinder Brake Fluid Leak
A brake fluid leak can occur due to various reasons, such as damaged seals, corroded brake lines, or a faulty master cylinder. It is essential to address a brake fluid leak immediately, as it can lead to a loss of braking power and compromise your safety on the road.
Signs of a Brake Fluid Leak
- Low Brake Fluid Level: If you notice your brake fluid level is consistently low, it could be a sign of a leak in the system.
- Leaking Brake Fluid: A visible leak under your vehicle or near the wheels could indicate a brake fluid leak.
- Soft Brake Pedal: A soft brake pedal that goes all the way to the floor before engaging the brakes could also be a sign of a brake fluid leak.
- Reduced Braking Power: A brake fluid leak can cause a significant decrease in your vehicle’s braking power.
If you experience any of these signs, it is crucial to have your vehicle inspected by a professional mechanic.
Master Cylinder Brake Light Switch
The brake light switch is a small component located near the brake pedal. It is responsible for turning on the brake lights when you press the brake pedal. If this switch fails, your brake lights may not turn on, which can be dangerous for you and other drivers on the road.
Signs of a Faulty Brake Light Switch
- Brake Lights Not Turning On: The most obvious sign of a faulty brake light switch is when your brake lights do not turn on when you press the brake pedal.
- Stuck Brake Lights: In some cases, the brake lights may remain stuck on even when the brake pedal is not pressed.
- No Cruise Control: Some vehicles use the same switch for both the brake lights and cruise control. If your cruise control stops working, it could be due to a faulty brake light switch.
If you experience any of these signs, it is essential to have your brake light switch replaced by a professional mechanic.
Master Cylinder Brake Bleeder
A brake bleeder is a small valve located on the brake calipers or wheel cylinders. It allows air and brake fluid to escape from the system, ensuring that there are no air bubbles trapped in the brake lines. Regularly bleeding your brakes can help maintain the performance of your braking system and prevent any potential issues.
How to Bleed Your Brakes
- Start by locating the brake bleeder valve on each brake caliper or wheel cylinder. It is usually located at the top of the component and has a small rubber cap covering it.
- Remove the rubber cap and attach a hose from a brake bleeder kit to the valve.
- Have an assistant press down on the brake pedal while you open the valve. This will allow the brake fluid and air bubbles to flow out of the system.
- Close the valve and release the brake pedal. Repeat this process until no more air bubbles are visible in the brake fluid.
- Once all the air bubbles are removed, close the valve and replace the rubber cap.
- Repeat this process for each brake caliper or wheel cylinder.
Master Cylinder Brake Bleeding Kit
A brake bleeding kit is a tool used to remove air bubbles from the brake system. Air bubbles can get trapped in the brake lines, causing a spongy brake pedal and reduced braking power. The brake bleeding kit uses a vacuum to draw out the air bubbles, ensuring that the brake system is free of any air pockets.
How to Use a Brake Bleeding Kit
- Start by locating the brake bleeder valve on each brake caliper or wheel cylinder. It is usually located at the top of the component and has a small rubber cap covering it.
- Remove the rubber cap and attach the hose from the brake bleeding kit to the valve.
- Have an assistant press down on the brake pedal while you open the valve. This will allow the brake fluid and air bubbles to flow out of the system.
- Close the valve and release the brake pedal. Repeat this process until no more air bubbles are visible in the brake fluid.
- Once all the air bubbles are removed, close the valve and replace the rubber cap.
- Repeat this process for each brake caliper or wheel cylinder.
Master Cylinder Brake Line Adapter
A brake line adapter is a small device used to connect different types of brake lines. For example, if you need to connect a rubber brake line to a metal one, you can use a brake line adapter to make the connection. It is essential to use the correct adapter to ensure a secure and leak-free connection.
Master Cylinder Brake Booster Diagram
A brake booster diagram is a visual representation of how the brake booster works and its components. It can be helpful when troubleshooting brake issues or when replacing the brake booster. Below is a simple diagram of a typical brake booster:
Master Cylinder Brakes Cost
The cost of replacing a master cylinder brake can vary depending on the make and model of your vehicle and the severity of the issue. On average, the cost of a new master cylinder brake can range from $150 to $350. Labor costs can also add an additional $100 to $200 to the total cost. It is essential to have your vehicle inspected by a professional mechanic to get an accurate estimate for the cost of replacing your master cylinder brake.
Master Cylinder Brake Switch
The master cylinder brake switch is a small component located near the brake pedal. It is responsible for turning on the brake lights when you press the brake pedal. If this switch fails, your brake lights may not turn on, which can be dangerous for you and other drivers on the road.
Signs of a Faulty Brake Switch
- Brake Lights Not Turning On: The most obvious sign of a faulty brake switch is when your brake lights do not turn on when you press the brake pedal.
- Stuck Brake Lights: In some cases, the brake lights may remain stuck on even when the brake pedal is not pressed.
- No Cruise Control: Some vehicles use the same switch for both the brake lights and cruise control. If your cruise control stops working, it could be due to a faulty brake switch.
If you experience any of these signs, it is essential to have your brake switch replaced by a professional mechanic.
Video
Conclusion
The master cylinder brake is a critical component of your vehicle’s braking system. It is responsible for converting the force exerted on the brake pedal into hydraulic pressure, which engages the brakes.
Regularly maintaining and inspecting your master cylinder brake can help ensure its proper functioning and prevent any potential issues. If you experience any problems with your brakes, it is crucial to have them inspected and repaired by a professional mechanic to ensure your safety on the road.
Hi there! I’m Naomi O’Colman. I’ve got years of experience working at an auto repair shop here in Texas under my belt. On top of that, ever since I was a kid I’ve been passionate about the auto industry. Since I’ve joined the team at automotivegearz.com I’ve been enthusiastically sharing my passion and insights with my readers. I’m dedicated to delivering high quality content and helping you stay up to date with the latest automotive trends and products out there!