

Been tasked with the cleaning car headliner, a common task for someone who has a car detailing business?
Bringing in extra income from car detailing is an often underappreciated source of profits. There are few things that take more time than a thorough detail job, but the returns can be astronomical if you know what you’re doing.
This detailed guide will give you all the tips and tricks to cleaning car headliners. We go over each and every step that is required to get this job done properly. We’ll explain how each key step in the process of cleaning car headliners is carried out, and we get into a bit of detail on why we’re doing what we’re doing.
But first, let’s touch on why we’re cleaning car headliners in the first place.
Why Cleaning Headliner is Necessary?
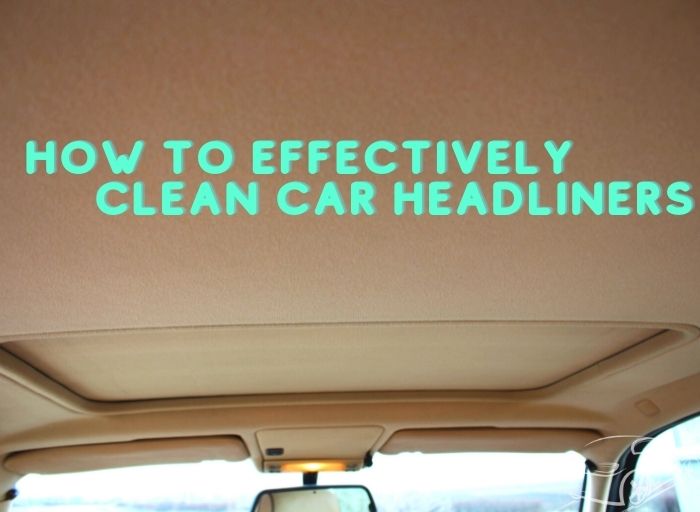
According to Wikipedia, the headliner is the interior lining of the roof of a car. It is typically made out of vinyl or fabric material. In older vehicles, it was typically made out of cloth. The old-fashioned term is “carpet.” Many people leave this messy as they go for a long time because it’s difficult to clean up.
A car headliner is a place where all waste materials are accumulated during long traveling. So to remove all this it becomes necessary to remove the headliner and wash it. There are several ways to clean your car headliner.
There are different types of stains that you can find on the car headliner, including water stains, beverage stains, makeup stains, skid marks, and oil or grease stains.
Check out: How to remove stains from your car seats FAST!
Now that we have a better idea of what type of stains can be found on car headliners, it’s time to talk about how to clean them up. Follow the steps below for a complete guide on how to get your car headliners looking brand new.
Signs of A Dirty Headliner
A dirty headliner, also known as the roof liner or headlining, can be unsightly and may also cause unpleasant odors in the vehicle’s interior. Here are some signs that indicate your headliner may be dirty:
- Stains and Spots: One of the most obvious signs of a dirty headliner is visible stains and spots on the fabric or material that covers the vehicle’s roof. These stains can be caused by spills, dirt, food, beverages, or even oil from hands.
- Discoloration: Over time, the headliner material can start to discolor due to exposure to sunlight, cigarette smoke, or other environmental factors. The once uniform color may become patchy or faded.
- Grime and Dust Accumulation: A dirty headliner may accumulate grime and dust particles, especially in the areas near air vents. This buildup can be more noticeable in lighter-colored headliners.
- Unpleasant Odors: If the headliner has absorbed odors from smoke, pets, food, or other sources, it may emit unpleasant smells, especially when the car is closed for an extended period.
- Sagging or Drooping: In some cases, a dirty headliner may become wet due to leaks or spills, causing it to sag or droop in certain areas. This is a clear sign that moisture has affected the headliner.
- Visible Mold or Mildew: If moisture has been trapped in the headliner for an extended period, it can lead to the growth of mold or mildew. Visible patches of mold or mildew are a definite sign of a dirty and potentially damaged headliner.
How to Clean Car Headliner
Items Needed
- Soft cloth
- Brush
- Upholstery cleaner
- A suitable cleaner
Spot Cleaning
If you find minor stains on the car ceiling, it’s quite simple and easy to remove them.
You should choose a suitable cleaner for different stain types. For example, water-based stains like coffee or beverage can be tackled by a general upholstery cleaner. For makeup or skid marks, you can use fabric-based cleaning products. But for oil or grease stains, you need to go with a specialized upholstery cleaner.
Since the car headliner is highly prone to dirt and grime buildup, we should have a general protection plan in place for those types of stains. If we find any stain on our car headliner that’s caused by dirty hands, we need to remove it as soon as possible.
Here is how I do it:
- Use the brush or cloth to wipe away any loose dirt
- Spray the upholstery cleaner to the cloth, then dab the stain to moisten it
ATTENTION: DON’T saturate, you may end up damaging the glue part holding the headliner together.
- After that, use a dry cloth to rub the stains gently
Surface Cleaning
You can use an all-purpose cleaner or specialized cleaning pads for surface cleaning.
If your car uses a plastic headliner, you should avoid using water-based products to clean it because it may damage the plastic.
You need to be very careful when using water-based cleaners on your vehicle’s plastic headliner. If the cleaning solution gets inside the headliner, it could cause the plastic to warp and crack.
Find out: How to clean your car’s air vents easier!
For surface cleaning, spray the upholstery cleaner on the whole headliner area. Let the cleaner sit for a while to break down the stains or soil. After that, you can clean the headliner with a soft brush. Remember, don’t scrub too hard in order not to damage the headliner.
It may take several times to clean the headliner perfectly.
Deep Cleaning
This is your last resort when the headliner is too dirty or smelly. Deep cleaning will somewhat ruin the headliner, so be careful with this.
You will need a steam cleaner and the upholstery cleaner for this task.
Divide the headliner into small sections and work with each section at a time. You can spray the cleaner to the entire section and then vacuum it. Don’t saturate it, as the glue holding the headliner may fall apart.
Make sure that you let the headliner dry completely. You can use a dryer or open the car’s doors if it’s sunny.
How to Make a DIY Cleaning Solution for Your Car Headliner
To make a DIY cleaning solution for your car headliner, you can add water to the solution.
Here’s an example of how I do it:
- Fill the bucket with water and add a general household cleaner, as its brand name says
- Add 1/4 cup of vinegar to the bucket
- Add a coating of baby shampoo to the headliner
- I usually let the car’s doors open so that it dries out quickly.
How to Keep the Car Headliner from Getting Dirty
I wanted to cover a few key points that’ll help keep your car headliner clean for the long haul.
If you have controls on either side of your vehicle’s driver seat, ensure they’re covered with vinyl instead of cloth. Cloth covers tend to trap dirt and don’t wipe clean as vinyl covers do.
Clean the area under your seats if possible. Remove the seats and vacuum the dirt from under there.
Make sure you check your headliner before cleaning it. Look for any holes or tears. If you find any, try to make a patch and then mask it off with scotch tape or some other type of tape so that you don’t get liquid up there when cleaning.
Don’t put anything on top of your headliner unless you want it to end up with a permanent stain. Things like cups, glasses, books, etc.
Avoid applying any type of oils directly to the headliner. Oils tend to attract dirt and dust and can cause marks or stains. Instead, apply the oils to a place you don’t mind getting them on.
How to Remove Bad Odor From Headliners
There are several ways to remove bad odor from headliners.
- Apply vinegar to the smell spots (make sure you rub the vinegar with a toothbrush or your fingers) until it’s gone.
- Use baking soda and put some on the small spots. You need to leave it overnight or at least for several hours.
- Spray scented cleaners onto the stains or odors. Be careful not to saturate it so that it doesn’t damage your headliner.
- If the smell doesn’t fade, put a piece of charcoal in tin foil. Put it in the headliner. Let it sit overnight and has to remove the odor.
- If you can’t remove the odor at home, then you need to take your car to the auto mechanic for this kind of task.
- If you don’t want to go through any hassle anymore, I suggest you buy a cover for your car headliner.
How to Clean Headliner Accessories
Cleaning headliner accessories requires special care to avoid damaging them. Here’s a general guide on how to clean different headliner accessories:
- Sun Visors: Sun visors can accumulate dust and grime over time. Use a mild all-purpose cleaner or a mixture of water and gentle soap. Dampen a soft microfiber cloth with the cleaning solution and gently wipe both sides of the sun visor. Avoid using excessive water or aggressive scrubbing to prevent damaging the fabric or cardboard inside the visor.
- Grab Handles: Grab handles are typically made of plastic or rubber. Clean them with a mild interior cleaner or a mixture of water and a small amount of dish soap. Dampen a soft cloth with the solution and gently wipe the grab handles. Be cautious not to use any harsh chemicals that might degrade the material.
- Coat Hooks: You can use the same mild interior cleaner or soapy water mixture for plastic or metal coat hooks to wipe them clean. A soft cloth or sponge can be used for this purpose.
- Interior Lights: Dust and fingerprints can accumulate on interior lights. Turn off the lights and allow them to cool down before cleaning. Use a microfiber cloth slightly dampened with water or an alcohol-based cleaner to wipe the light covers gently.
- Rearview Mirror: Clean the rearview mirror with a soft microfiber cloth and a glass cleaner. Spray the glass cleaner on the cloth and gently wipe the mirror’s surface to remove smudges and dirt.
- Other Trim Pieces: Some vehicles have additional headliner accessories like small trim pieces or cosmetic covers. Clean these parts with a mild interior cleaner and a soft cloth, similar to the process for cleaning sun visors and grab handles.
Important tips:
- Always use soft microfiber cloths or soft brushes to avoid scratching or damaging surfaces.
- Avoid spraying cleaning solutions directly onto the accessories, as it may seep into sensitive areas and cause damage.
- Test any cleaning product in an inconspicuous area first to ensure it doesn’t cause any adverse effects.
- Be gentle while cleaning, especially for accessories that are made of delicate materials like fabric or thin plastics.
Headliner Replacement and Repair
Signs of Irreparable Damage
In some cases, the headliner may suffer irreparable damage, and replacement becomes necessary. Signs of irreparable damage include:
- Extensive tearing or large holes in the headliner fabric.
- Severe water damage causes sagging, mold, or mildew growth.
- The headliner material is disintegrating or falling apart due to age and wear.
Repairing Minor Headliner Issues
Some minor headliner issues can be fixed without the need for full replacement. Here are some common repairs for minor problems:
- Small Tears or Holes: Small tears or holes can be repaired using headliner repair kits that contain adhesive-backed patches. The patches are applied to the damaged area to reinforce and cover the imperfections.
- Sagging Headliner: If the headliner is sagging due to weakened adhesive, it can sometimes be reattached using a high-strength fabric adhesive. The headliner is carefully pulled down, and adhesive is applied between the fabric and the backing board to reattach it securely.
Seeking Professional Replacement Services
When the headliner damage is extensive or beyond repair, it’s best to seek professional headliner replacement services. Here’s what the process typically involves:
- Removal: The old headliner is carefully removed from the vehicle. This may require removing trim pieces, handles, and other accessories attached to the headliner.
- Cleaning: The interior roof surface is thoroughly cleaned to remove any adhesive residue and dirt.
- New Headliner Installation: The new headliner, which can be purchased as a pre-cut replacement, is installed onto the vehicle’s interior roof using adhesive. The installer ensures proper alignment and a smooth fit.
- Reassembly: After the new headliner is securely in place, all trim pieces, handles, and accessories are reattached.
- Quality Check: A final quality check is performed to ensure everything is in place, and the headliner looks and functions as intended.
Frequently Asked Questions
#1 Can you shampoo a car headliner?
The short answer is no. Most car headliners that are made of plastic cannot be shampooed. But removing stains with this technique works well enough to make it worth a go.
#2 What’s the best car headliner cleaner?
If you want a good cleaner, then I suggest you go for a foam cleaner. The chemicals in the foam cleaners will help remove grime and other residues with little effort.
#3 How do you clean a convertible headliner?
Many headliners are made of fabric material. And if you have a convertible car, then it’s more true than in the above paragraph. You still can follow the above instructions.
#4 How often should I clean my car headliner?
The frequency of cleaning your car headliner depends on your usage and the condition of the headliner. As a general recommendation, it’s good to include the headliner in your regular car interior cleaning routine, which may be done every few months. However, if you notice visible stains, dirt buildup, or unpleasant odors, you may need to clean it more frequently.
#5 Will cleaning the headliner remove all stains and odors?
Cleaning the headliner can effectively remove many stains and odors, especially if you address them promptly. However, some stubborn stains or odors might require professional cleaning services or specialized treatments, especially if they have been ingrained in the material or have resulted from extensive water damage or mold growth.
#6 Is it possible to fix a sagging headliner without professional help?
Fixing a sagging headliner can be challenging without proper tools and expertise. While some minor sagging can be temporarily addressed with adhesive sprays or headliner repair kits, a long-term and permanent fix often requires professional reattachment or replacement of the headliner. DIY attempts may not provide lasting results and could lead to further damage.
#7 Are there any specific products I should avoid when cleaning the headliner?
Avoid using harsh chemicals, strong solvents, bleach, or abrasive cleaners on the headliner, regardless of its material. These products can damage the headliner fabric or material and may cause discoloration or other issues.
#8 Can I use steam cleaning on the headliner?
Steam cleaning on the headliner is generally not recommended, especially if it involves excessive moisture. Steam cleaning can saturate the headliner and cause damage to the backing board or adhesive, leading to sagging or other issues. Stick to gentle dry cleaning methods for the best results.
#9 How can I prevent mold growth on the headliner?
To prevent mold growth on the headliner, avoid exposing it to excessive moisture. Fix any leaks in your car’s roof or windows promptly. If your car gets wet due to rain or spills, make sure to dry the headliner thoroughly as soon as possible to prevent mold from developing.
#10 What should I do if the headliner gets wet?
If the headliner gets wet due to rain or spills, use a clean and absorbent cloth to blot the moisture as much as possible. Leave the car doors or windows open to promote drying. To prevent mold growth, ensure the headliner is completely dry before closing up the car.
#11 Can I machine wash the car headliner?
No, machine washing the car headliner is not recommended. Machine washing can cause significant damage to the headliner fabric and backing board. Stick to gentle hand-cleaning methods instead.
#12 How long does it take to clean a car headliner?
The time it takes to clean a car headliner depends on the extent of dirt or stains and the material of the headliner. A simple dry cleaning routine may take around 10-15 minutes, while more extensive cleaning, stain removal, or addressing odors may take longer, especially if professional cleaning services are involved.
Conclusion
The most important part of the exterior of a car is the headliner. It helps protect and maintain the interior of your vehicle after all. But like everything else, a little maintenance goes a long way in this case too. With 3 ways of cleaning the car headliner, you should be fine.
Hi everyone, My name is Ollie Barker.
As a seasoned auto expert I have 25 years of experience working in repair and detailing shops. I love to share my tips & tricks to all car lovers, so that’s why I’m here at Automotive Gearz publishing my content, sharing my passion. Also, I’ve been giving my recommendations on which products are the best to have on the market. I always thought it was hard to pick the right part, so hopefully I can make that a bit easier for you.
Hope you enjoy your time on my little blog!