

Car painting is not an easy task, and it’s usually done in an auto shop. However, if you’re enthusiastic about doing it yourself and you know some basic painting techniques, then it’s a possible DIY job. So, how to paint a car at home yourself? In this blog, I’ll show you what you need to prepare and how to do it.
How to Paint a Car at Home Yourself!
Things you need to prepare!
1. Time
The supplies needed to paint a car at home are basic, but you’ll need about twenty to thirty hours of painting time for a car that’s very small or larger models.
2. Paint brushes
You’ll need several paintbrushes to reach the car’s crevices and get into them because they will help you paint it. The brushes should be synthetic and of good quality. Brushes that are too soft don’t work well.
3. Plastic tray
A plastic tray contains paint and keeps it at the right temperature. You may also use a warm air paint gun, but a plastic tray will be more convenient than an air gun.
4. Painting templates
Painting templates are used to get your car painted evenly in one go, so you don’t need to take turns painting it. You should buy a set with several sizes to get the best results.
5. Plastic panel
You’ll need a plastic panel to cover your car when it’s not in use. The panel should fit perfectly, and it can be either temporary or permanent, but I think temporary is better for the size of the car you’re painting.
6. Sandpaper
Sandpaper is used to sand the car before painting. You can buy various types of sandpaper, but it doesn’t matter; you only need one to do the task.
7. Goggles and mask
To protect your eyes and face, you should use protective goggles and a mask when painting. It will keep you free of dust particles that can cause health issues.
8. Cloth
To wipe the car, a towel will do the job perfectly. You should get a soft one that can reach the crevices and rid of dirt in them.
9. Primer
The primer should be used first when you’re painting your car. Its main role is to create adhesion between the paint and the car surface so it will last longer. Finding a primer that matches your car’s color is difficult, so you’ll need to test various types until you find one or make one.
10. Paints
There are different paints available, which may vary, so you’ll need to test them first to see if that’s what you need. To achieve a good result, the paints should be used properly and in the right amounts. If not you’ll end up with a patchy or blotchy finish or your car will be faded after a long time. So, choose your paints carefully, because it’s important for a good job.
11. Find a suitable workstation
Before you start painting your car, you should find a suitable workstation. It’s better to do the job in a well-lit area to ensure that you don’t miss any spots. The workstation can be inside or outside your home, but it needs enough space for you to move freely.
Furthermore, if the workstation has enough space, then you can keep your painting equipment and supplies there so you can use them easily and will not waste time looking for them whenever you need them.
Also, you should ensure that the workstation is free of dust as well. It will be easier for you to paint the car if you do not get any dust on it.
The workspace should be well-ventilated to keep it clean and fresh. You should also wipe it clean with a wet cloth before use to keep it clean.
If you have to work outside, ensure the weather is nice and dry so the paint can dry fast.
How to Paint a Car at Home: DIY Guide!
Now that you have everything ready, you can start painting your car.
Stage 1: Rust treatment
Before touching the paint, you should fix all the rusted areas on the surface of your car. Sanding these spots can be a lot of work, so you should fix them first before painting.
Stage 2: Wash the car
When you wash the car, do it carefully to get rid of any dust, dirt, and possible paint from other sources. After washing, rinse it with water and dry it properly before starting painting. If you remove dirt, wax, and other sources of paint from the car’s surface before painting it, then you’ll get the best results.
Stage 3: Sanding

Sand the car by hand or use a sanding machine to remove rust and prepare the surface of your car for paint. You can use 120-grit sandpaper or higher if needed. Never use coarse sandpaper because it will ruin the paint on your car’s surface by scratching it and making it weak.
Sanding in circular motion is the best way to give you an even surface. You can use an orbital sander for a consistent result.
Stage 4: Priming
To get a better finish, you should primer the car. You can use a good-quality primer or a homemade one. But, using a good quality primer is better because it will ensure that your car’s surface will last longer and it will give a better finish.
You may need to mix the primer with the thinners in a predetermined ratio. Check the can for the correct mixture.
You should start spraying from the roof first. For a better result, 2-3 coats are recommended, and you need to let the primer cure and dry completely in between coats.
Spraying technique:
- For an even coat, use the spray in long sweeping motions and keep the gun moving all the time.
- The spray should be thin, so you need to thin it out by mixing it with water.
- Use a paint can with a good nozzle that will spread the paint properly.
Stage 5: Painting your car
The painting process should be done correctly and carefully because removing any mistakes is difficult. Always work from the top down, starting with the roof or trunk of the car.
The paint should be applied in long strokes. It will take you a while to get it right, but practice makes perfect, and you’ll do great after some time.
When painting bumpers and body panels, you should avoid over-spraying them so as not to create drips that might cause horizontal streaks on your car’s surface.
You shouldn’t spray your side mirrors because this will make them look foggy. It’s not easy to achieve a perfect finish, but with practice and patience, you’ll get there. Just be sure to spray enough primer and paint on the car’s surface to get an even and smooth result.
Stage 6: Lacquering
Lacquer is a clear and shiny finish that gives the car the gorgeous shine you always wanted.
The lacquer has three major components: thinner, colorant, and catalyzer. If you want to remove the lacquered layer on your car’s surface, you’ll need to dissolve them all with acetone or other solvents.
To avoid scratching the surface of your paint with a metal pad, use a high-quality soft cloth or paper towel.
Stage 7: Drying
You should wait for 24 hours after you apply your lacquer to dry it properly. This is hard to get right because you might have to wait for some time.
You should also use polyurethane sealant to seal the paint from humidity and body oils and protect it from UV rays so that your car will stay shiny for a long time.
Check out this video for more detail!
Important Tips
Here are some tips you should know to paint your car:
- Wear protective glasses and a mask at all times when painting. It’s important if you want to keep dust particles out of your eyes, nose, and mouth and avoid breathing them in. The protective glasses will help you avoid breathing any chemicals that could be harmful.
- Choose a nice, dry day to paint your car because wet conditions can ruin the paint on the surface of your car.
- Use good quality paints for your car. If you use low-quality paints, your car will fade and scratch easily after some time.
- If you do not want to make a mistake when doing the job, practice painting techniques first on an old car or anything else at home with colors that you don’t mind damaging. That way, you’ll get used to the process and be familiar with it before using it on your favorite car or anything that’s special to you.
- If you want better results for your car, ensure the paint is wet enough. It should cover the surface of your car and can’t be seen too much.
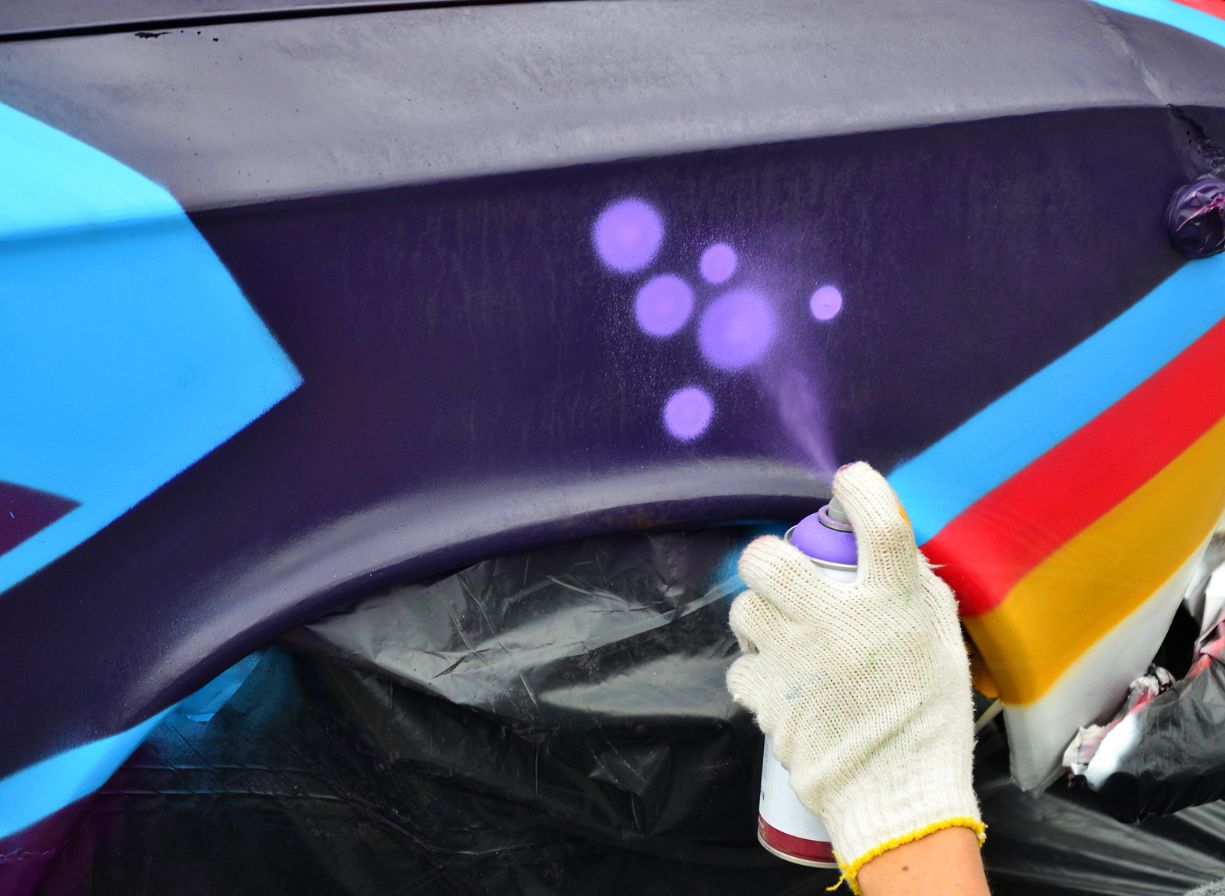
Paint a Car with Spray Cans or Brushes
These are the 2 most common methods we use to paint a car at home. If you’re not sure what to use, let weigh their pros and cons:
Pros and Cons of Painting a Car with Spray Cans

Painting a car with spray cans can be a viable option for some DIY enthusiasts. However, it’s important to consider the pros and cons before deciding to use this method. Here are the pros and cons of painting a car with spray cans:
Pros:
- Cost-Effective: Spray cans are generally more affordable compared to professional paint sprayers or paint guns, making them a cost-effective choice for small-scale projects.
- Accessibility: Spray cans are readily available at automotive supply stores, hardware stores, and online retailers. They can be easily purchased without the need for specialized equipment or professional training.
- Convenience: Spray cans are compact and easy to handle, allowing for greater maneuverability, especially in tight spaces or when painting smaller areas of the car.
- Simplified Process: Using spray cans simplifies the painting process since they usually come pre-mixed with the appropriate ratio of paint and propellant. This eliminates the need for complex mixing and reduces the chances of making errors in paint consistency.
Cons:
- Texture and Finish: Spray cans can sometimes leave a textured finish on the car’s surface. The paint may appear slightly uneven or have a speckled appearance, which may not provide the smooth and flawless finish desired for a professional look.
- Overspray and Wastage: Spray cans can produce significant overspray, which can result in paint wastage and potential damage to surrounding areas if not properly controlled. It requires careful masking and taping to protect unintended surfaces.
- Skill and Technique: Achieving a smooth and professional finish with spray cans requires a certain level of skill and technique. It can be challenging to apply the paint evenly, and mistakes such as drips or runs are more common with this method.
Pros and cons of painting a car at home with brushes

Painting a car at home with brushes can be an alternative method for those who prefer a more hands-on approach or do not have access to specialized painting equipment. However, it’s essential to consider the pros and cons before deciding to use this method. Here are the pros and cons of painting a car at home with brushes:
Pros:
- Affordability: Brushes for painting a car at home are a cost-effective option compared to professional equipment like paint sprayers or guns. Brushes are readily available and relatively inexpensive.
- Control and Precision: Brushes offer better control and precision, allowing you to have more detailed and intricate paintwork. It is easier to apply paint to specific areas, edges, or curves with brushes, which can result in a more accurate and customized finish.
- Accessibility: Brushes can be easily obtained from local hardware stores or online retailers. They are widely accessible, making them a convenient choice for DIY enthusiasts.
- No Overspray: Unlike using spray cans or paint sprayers, brushing paint onto the car eliminates the risk of overspray. This reduces the potential for paint wastage and the need for extensive masking and taping.
Cons:
- Painting a car with brushes can leave visible brush marks and texture on the surface. Brush strokes may be noticeable, detracting from a professional look.
- Painting a car with brushes is a time-consuming process.
- Brushed-on paint may result in uneven distribution and variations in color intensity.
- Brushes have limited coverage compared to spray equipment, making it more difficult to achieve a consistent and uniform finish, particularly in larger areas.
- Brushing paint onto a car increases the risk of runs and drips.
How Much Does It Cost to Paint a Car Yourself?
The cost of painting your car at home depends on the type of paint, primer, and lacquer you use. If you make your own paints from scratch, then it will save you quite a lot of money. Commercial paints that cost $60-$70 per gallon can cost up to $100 if you buy them in bulk.
The price will also depend on the method you use to apply it and the automotive supplies that include brushes, rollers, sandpaper, and other required items. The price of an average car paint job ranges from $150 to $350, but you can also get it from $100 to more than $400, depending on the size and length of the painting.
Professional auto painters will charge you an average price of around $450 to more than $700 for the same thing. But there are cheap and affordable ways to do the job.
FAQs
Q: Can I paint my car without using a paint sprayer?
A: While using a paint sprayer provides the best results, you can achieve decent outcomes with spray cans. Keep in mind that spray cans may leave a textured finish.
Q: How long does it take to paint a car at home?
A: The duration depends on various factors, such as the size of the car, the number of coats applied, and the drying time between coats. Generally, it can take several days to complete the entire process.
Q: Do I need to sand between each coat of paint?
A: Sanding between coats helps create a smoother surface and improves the overall finish. Use fine-grit sandpaper and ensure the previous coat is completely dry before sanding.
Conclusion
It’s very important to know how to paint your car in order to clean it and make it look new again. It could save you a lot of money if you know how to do it properly. Several steps are involved in painting a car, so make sure you follow them all.
Hi everyone, My name is Ollie Barker.
As a seasoned auto expert I have 25 years of experience working in repair and detailing shops. I love to share my tips & tricks to all car lovers, so that’s why I’m here at Automotive Gearz publishing my content, sharing my passion. Also, I’ve been giving my recommendations on which products are the best to have on the market. I always thought it was hard to pick the right part, so hopefully I can make that a bit easier for you.
Hope you enjoy your time on my little blog!